Watts is expanding fast! We have exciting distributor opportunities across Canada and in the US. Click Here to Become A Watts Distributor
Watts Helpful Hub Of Happiness
Welcome to the Watts Helpful Hub of Happiness! Why did we choose such a toungue twister? I am not sure but I bet you will remember what it is called! :)
Watts 2.0 – Set a schedule
Schedules allow you to create automatic events on a recurring timeline to turn the lights on and off to specific settings automatically.
At the time of the creation of this article, schedules have the following features :
- Automatic Sunrise Algorithm
- Automatic Sunset Algorithm
- Time of date
- Recurring on any day on the week
- 10 schedules in total (8 day of the week, 1 sunrise and 1 sunset schedule)
Currently, in our timeline, we have the following features planned (unfortunately there is no set date for this release)
- Set schedules for any time of the year (instead of recurring on a day of the week, you can set it so that "on May 5th, 2025, turn the lights on at 8:00am"
- More Sunrise and Sunset schedules
- Cloud Schedules (not stored on the controller) which means that you can have the cloud trigger even more schedules (possibly DOZENS) as long as the controller has an active internet connection.
- The ability to schedule events on select segments.
- The ability to set the brightness of the scheduled event.
- The ability to set the speed of the scheduled event.
- The ability to set the intensity of the scheduled event.
To create a schedule, start by clicking on the "Schedule" button in the bottom menu, on the right corner of the screen once you are in the device control screens.

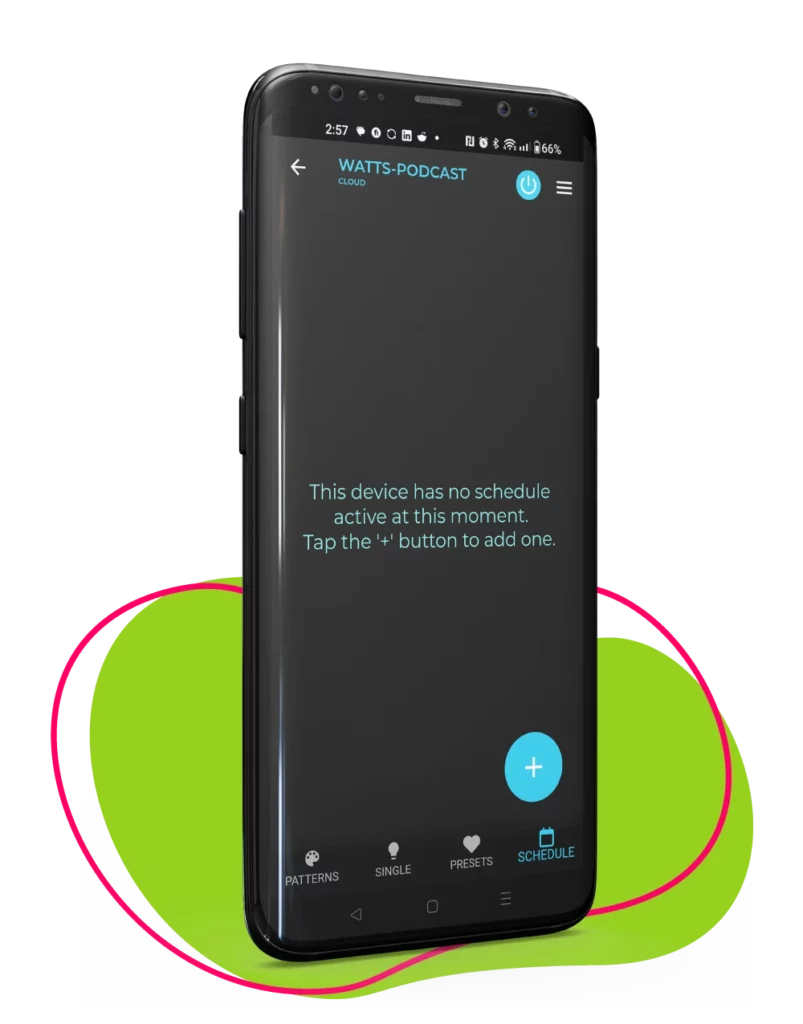
Once you are on the SCHEDULE screen, if you already have any schedules set, you will see them listed. If you do not have any schedules yet, you will see this screen.
Whether you see schedules listed or not, you will see a blue circle with a ' + ' in the center of it in the bottom right corner of the screen. Pressing this will allow you to add a NEW schedule.
Once you press the blue circle with the ' + ', you will see a popup menu. That popup menu will give you 3 types of schedules that you can create.
- "Add Time of Day"
This is our regular weekly recurring schedule. you can choose any day of the week, and a time of day, and select to turn the lights on, or off. When turning the lights on, you can also select which preset (if any) you would like to have the lights automatically set at that time.
Leaving the lights to just "on" instead of using a preset will use the last setting you had on the lights before they were turned off. - "Add Sunrise"
This will action the schedule to an automatically adjusted time of day calculated for when The Sun is rising. This time is different every day and you never need to adjust the timing between Winter and Summer. - "Add Sunset"
This will action the schedule to an automatically adjusted time of day calculated for when The Sun is setting. This time is different every day and you never need to adjust the timing between Winter and Summer.


Now that you are in the schedule creation screen, you will see some straightforward setting options. This screen is modeled similarly to the most common cell phone alarm apps on the market for a familiar and easy-to-use configuration.
At the top left, you will see the current time that is set on the controller. Next to that, you see a typical toggle. If set to on (blue, and the dot to the right) means that this schedule is active. If you ever want to disable your schedule without deleting it, but tapping this toggle in the top right you can disable the schedule (grey and the dot to the left).
Below that, by clicking on the smaller time under the "edit time" text, you will see a popup to adjust your time. To set AM or PM, simply click on whichever option you prefer to the right of the time. Highlighted in green means that is the active selection.
Next, you can choose to turn the lights on or off by clicking in the box and selecting the option you choose in the dropdown.
Under that, if you are turning the lights on, you will see the option to turn the lights on to a specific preset. If you are turning the lights off, this is hidden.
The last option to configure is the days of the week that you want to have this schedule occur. Every day of the week in GREEN will be active. The days of the week start with Sunday on the left and end with Saturday on the right.
Make sure to click save at the bottom to store the schedule on your controller :)
HAPPY CUSTOMERS


